Friday, December 7, 2012

We have winners!

So here is where I go all virtual ghetto on you. I pulled the numbers out of the random generator, and since I can't figure out a simple way to post a screenshot, I just did this:

Fancy, no?


I was all giddy and la-la-la when I virtually pulled the first number. 5. FIVE! Easy to count. Oh, so easy.

Then. Number 187. Seriously? You suck, random number generator. But 20 minutes later I had counted to 187 twice to be sure I had the right person.

So, the winner of the gift certificate is Melissa Ann, who has twin 3 year old girls with absolutely lovely names: Aeralind and Bronwyn. Even though they don't like dolls, maybe they like dresses?

And the winner of the scrap box is Who-lee-uh. I don't know anything about her, but I'm sure she is a person who will give a happy home to a box of wayward scraps.

Now, for the rest of you sad peeps, I have a coupon code. NotAWinner2012 will get you 20% off the stuff in the shop. I got a lot (a lot) of good advice this Giveaway Day. So I'll be putting some scrap boxes or envelopes in there as I fill them. In fact, I can just have a box sitting next to me all the time. Awesome idea, that. I think I should get a prize for thinking of it! I'll keep that code up till the end of January, unless I forget to take it down.

Hope you win something somewhere else!

Monday, December 3, 2012

Giveaway Day!


Hello, all you crafty people from Sew, Mama, Sew. It is a bright and sunny morning, I have a hot cup of coffee beside me, and it is Giveaway Day. What could be better?

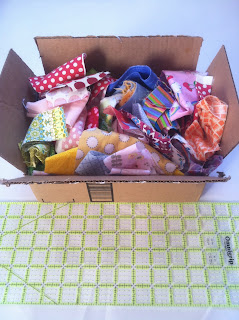
I have a box of scraps for you to win. I just recently opened my own Etsy store, and suddenly I am overrun with scraps. It is crazy how many scraps I have. Besides. I always like winning a big box of scraps. Who doesn't?


Now, I took this picture and then realized that this box is much too small. In reality you will get a flat-rate box jammed with as much as I can get in it. I can't promise it won't be wrinkled, though.

So, to win this lovely box of scraps:
Since I just opened my Etsy store, Made By Little Crickets. It is proving to be more challenging than I had imagined, and I would love to have some advice. If you have your own shop: how do you decide on prices? how do you organize? how do you promote yourself? If you don't have your own store: what makes a store one of your favorites? what makes you really just 'have to have' something you see on Etsy? What is the best incentive for buying - low postage, price, customization?

My shop sells kids clothes and doll accessories. Please go over and take a look. You don't have to. It's not a requirement for the giveaway, and I know if you don't have kids, or know some kids, you couldn't care less about my shop. But if you do have kids, or know kids, or see kids on the street occasionally, please go on over and take a peek. All constructive commentary is welcomed.

To win, you must comment on my shop, Etsy shops, or any other thing loosely related to shopping for handmade goods online or kids or something. Any comment not containing something of that nature will be deleted. I am super serious this time. Your comment won't even make it online.

I will randomly choose a winner with the generator and send your package out by the designated time. Likely Saturday morning. I will ship overseas, but your package might be a wee bit smaller if I do. I will randomly generate a name and post the winner Saturday morning after my girls jiu jitsu class - about 11am EST. I will then proceed posthaste to the post office. Or maybe I'll do that in reverse. I'll figure out the details eventually.

Good luck and Happy Giveaway Day!

Oh, and I have another giveaway - a gift certificate to my shop. Go check it out if you like what you see over there!

Happy Giveaway Day!


Hello There!

Don't you love Giveaway Day? It's almost better than Christmas, so I'll cut to the chase.


~ I don't blog much, but I always have hope of getting better.
~ I opened an Etsy store, Made By Little Crickets, six weeks ago. I make clothes for kids and doll accessories. Here is what I have learned: running an Etsy store is a lot harder than I imagined.
~Here is what I'm asking you to do. Give me advice. If you have a shop of your own, tell me what works for you. If you don't, tell me what you like about other shops. What makes a shop a favorite of yours, or what makes you want to make a purchase at a shop? You will only be entered into the giveaway if you make some sort of comment about my store or Etsy stores in general or any other vaguely shop related comment. All others comments will be deleted. I am really serious about this, this time.

Here is my store Facebook page. I usually post when I put something new in the shop, or when I have a new design. So you won't be getting junk from me every day. I just want it to be a good way for people to see the new stuff I've added in my shop without having to go over there.
I am enthusiastically inventing, and I have new stuff going in the shop regularly. Someone asked if I could make a wipes case, so I did. Someone asked for a changing pad, so I made one. If you want something you don't see? That's my favorite part. I love designing little things.

I will randomly choose a winner with the generator and send your package out by the designated time. Likely Saturday morning. I will ship overseas, but your package might be a wee bit smaller if I do. I will randomly generate a name and post the winner Saturday morning after my girls jiu jitsu class - about 11am EST. I will then proceed posthaste to the post office. Or maybe I'll do that in reverse. I'll figure out the details eventually.

Good luck and Happy Giveaway Day!

Oh, and I have another giveaway - a big box of scraps. Lots of largish pieces leftover from my shop. It produces copious amounts of scraps!

Sunday, December 2, 2012

The dark recesses of my mind

I definitely had to go to the dark recesses of my mind to remember how to use Blogger. And since I recently shared my coffee with my laptop, it was doubly difficult to remember because I am on a new-to-me-but-older-than-dirt laptop. She is actually quite lovely to look at, but a little on the chubby side, and likes to be always holding on to the ethernet cable. Ah, well, then. Next time I will be a little less gracious with my coffee and a little more graceful.

Now it is time for me to come clean and admit that which I would not admit.

Remember last year at this time? Well, at least remember that Sew, Mama, Sew held its righteous Giveaway Day? And I was all "I won fouuur giveaways and I'm going to give away fouuuur prizes, too." Well.

All I can say is that Deb and Yana will receive their packages soon. I finally sent them last week. I swear. And I hope you weren't thinking mean, evil thoughts about me all year. Really, my heart is in the right place, it is my head that gets diverted.

So, now. I had to admit that before I could go on blogging. And since Giveaway Day is here again, I had to get my shinola together, right? An here, I give you a recap of the last year in 25 words or less:

anatomy I. anatomy II. algebra. college algebra. puppy fostering. flock of 6 chickens. two children. kindergarten. third grade. etsy shop. flu. pneumonia. halloween. thanksgiving. now.

Truthfully, I didn't mean to open an Etsy shop. I had made these lovely dresses and put out on Facebook how I would sell them if anyone wanted one (Kyoko by ModKid - love that one) and everyone said "Oh, they are so beautiful and blah blah blah and you must open an Etsy shop" So I did, and was immediately out of commission for three weeks with the flu, which turned into pneumonia. And I have only sold one dress, and that was the first day I put it out on Facebook.

BUT!

Someone else asked for doll diapers on Facebook, and I said "Oh, I can make you some." And I did and she paid me and told me I should put them in my shop, too. I was reluctant, but I did. And yes, doll diapers sell! Who would have known? I never ever would have picked that to specialize in, but it is fun, and I have come out with some new doll things, too.

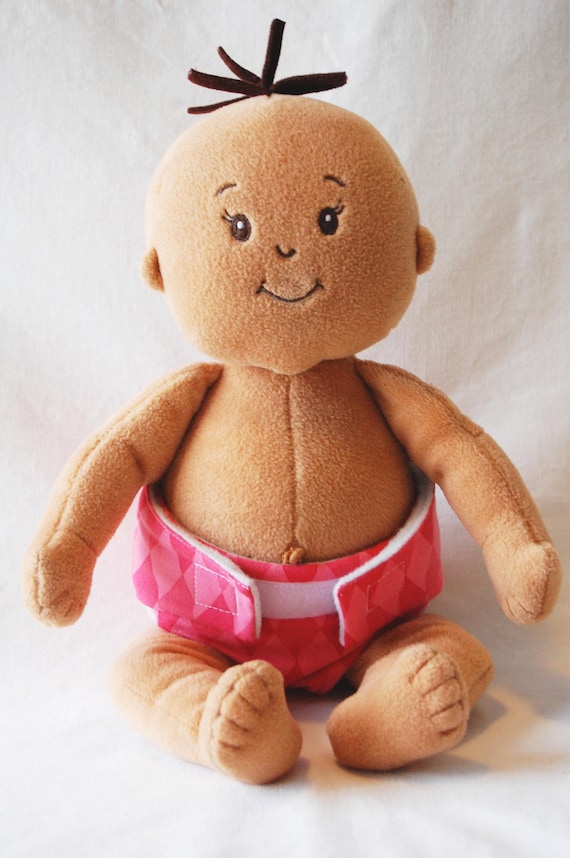
I know. A blog post without a picture. Here you go, then. My little model, Baby Stella, in a luxurious pink number.


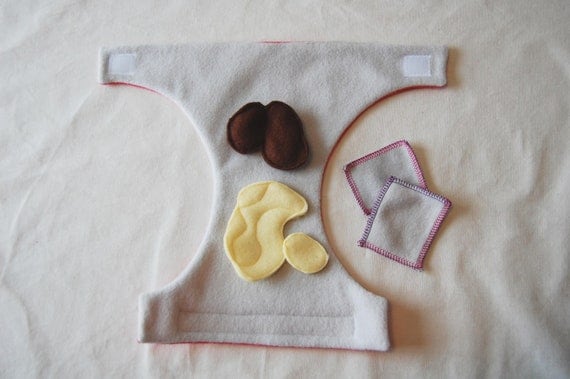
But this is what kills me:


They come with pee and poop and wipes! Because really - isn't that more fun?

So that is what has been keeping my shop afloat. I mean, I only opened it 6 weeks ago, and was promptly ill for 3 of them, so I am certainly not complaining. In fact, I am pleased as punch.

And that brings us to tomorrow - Giveaway Day. You have only one guess as to what I am giving away. Here's a hint.

See you tomorrow!

Sunday, February 26, 2012

Hearting my family


I'm not sure I have ever given my husband a Valentine's Day gift before. And even this one was given quite unceremoniously. It's not that I don't care - I do. I wicked heart him. But he's not the kind of guy you can give a card, or a trinket. I bet he wouldn't turn down a box of chocolates, but he loves me enough to let me eat them all. Or at least most of them. This Valentine's Day, though, I just so happen to be taking Anatomy and Physiology 2. Yes, just shoot me now. And it also just so happens that we have been studying the heart.

So this is what I came up with. Study guide for me, random odd t-shirt for him.

If you want to do it up right, try to make the body of the heart about the size of your fist, and set the heart slightly off center to the left. I couldn't really bear it, though, so the one I made is really pretty close to the center. Um, in the center. Almost exactly in the center.

Here are the things you will need:
- a t-shirt or something to adhere your heart to
- the lightest weight wonder-under you can find. We will be layering the pieces, so this is important.
- applique fabric in your choice of colors. I used pieces of old t-shirts.
- embroidery floss

So to start, print out the pattern. I've never made a tutorial before, so I'm pretty sure this isn't the best way to do it, but this pattern sheet is 8x10.5  if that helps with printing. Of course, you can make your heart any size you want.


A couple notes about the pattern pieces. Each has an arrow pointing up to make them easier to place; the shaded parts are the places where another piece will lay on top of that piece and each if labeled with a color. Note that there are arteries that should be cut in blue and veins that should be cut in red, even though that seems counterintuitive. If you are curious, here is an explanation. You don't have to read it for the tutorial.

Technically, veins bring blood to the heart and arteries take blood away from the heart. For the most part, the veins coming in have deoxygenated blood in them.They are represented by coloring them blue. However, when the deoxygenated blood comes into your heart, it goes into the right atrium and then the right ventricle. The right ventricle pumps it out to the lungs to go get some oxygen. So it is deoxygenated, but it is leaving the heart to go to the lungs. Those are the blue pulmonary (lung) arteries. The blood travels through your lungs, picks up some oxygen, and travels into the pulmonary veins. They are veins because they are bringing blood to the heart, but they are red because they are carrying oxygenated blood. And just to finish it up, I will tell you that the blood goes from the pulmonary veins into the left atrium, and then into the left ventricle, and the left ventricle pumps that blood out to your body to deliver the oxygen.

Okay. So first you need to print your pattern and make sure the pieces are the right size. If you can, try printing them in reverse on the back side of some wonder-under. This will save you a couple steps. But if not, then print them out, and trace each piece in reverse onto the back of the wonder-under using a light box or window. If all else fails, cut each piece out (like I did) and trace each piece onto wonder under (like I did) and then cut each piece out again (like I did). In case you didn't read the hidden message in there... don't do like I did. You will give yourself a headache.

Once you have all your pieces cut out of wonder-under, lay them on your colored pieces of fabric and iron. I used traditional colors, but you don't have to. In fact, if you wanted it to be more realistic, you could make it in various shades of red. But then you would have to embroider some realistic fat on, methinks. It's a judgement call.


Cut your adhered pieces out of the colored cloth and we will begin to arrange them. It's kind of like a puzzle, so first print out this page here. This is my original heart drawing synthesized from many, many anatomical pictures of hearts. It is not exact, but guess what? All people's insides, just like their outsides, are slightly different. Did you know that? So no matter what you do, it is okay!


Notice that my aorta is shaped differently from yours. At first I cut a slit to make the arch, but then I removed some to make it less bulky. So you just need to fit your pulmonary artery  into the aortic arch. Go ahead and lay them right on top of the picture to help with placement.


Lay the pulmonary veins in place.


The vena cava goes over the pulmonary veins and snuggles up to the aortic arch.
Lay down the body of the heart. The real one contains two atria at the top and two ventricals below. The right side of the heart (remember that is the left side of the picture) pumps blood to your lungs. The stronger left side pumps it out into your body. 


Here we color the atria so you can see them. 

Now that you have it all on there, position the heart where you want it on your shirt/bag/beach towel and gently hold it together while you slide the paper out from underneath. 

Put the paper on top and iron. When everything seems to be stuck down well, remove the paper and iron a little more.


Now you are essentially done but for the decorating. I embroidered more veins and arteries on there. The heart needs a blood supply too, you know. I also hand stitched the atria down because they were having a hard time sticking. I guess there's such a thing as too much wonder-under.


If anyone tries this project, I'd love to see the finished product and hear any feedback you have. This being my first tutorial and all.

And though I don't have a tutorial for what I made my 5 year old, I want to show it to you as well. She loves anatomy. She has an invisible man with squishy organs that she loves to take out when I am studying. So for her, I made an interactive heart. There are two red cells - erythrocytes - that are oxygen depleted on one side and oxygen rich on the other.


The heart is hollow inside so the cells can go into the vena cava from either end or they can come out the aorta. It makes me proud that my 5 year old knows that the cells can't go out the vena cava or in the aorta.


There is a velcro pocket on the back to help get those big cells in and out. The cells should be a lot smaller, but what fun would that be?! Besides, real erythrocytes have elastin in them so they can bend and get into teeny tiny capillaries.


The pulmonary veins and arteries aren't open, but she doesn't seem to mind.